00 Catch Up Guide
October 2025 (959 Words, 6 Minutes)
Catch-Up Guide: Reset Your Repository to a Lecture Checkpoint
When to Use This Guide
If you’ve fallen behind in the lectures or your repository is broken and too difficult to fix, you can reset your repository to match a specific lecture checkpoint.
⚠️ Warning: This will delete all your current work. Make sure to backup anything you want to keep!
Before You Start: Choose Your Terminal
You’ll need to run commands in a terminal. Here are your options:
Option 1: VS Code Terminal (RECOMMENDED for most students)
If you’re using VS Code (Visual Studio Code):
- Open VS Code
- Press Ctrl + ` (backtick) or go to View → Terminal
- At the bottom of VS Code, you’ll see a terminal panel
Which shell to use in VS Code?
- Windows users: Click the dropdown in the terminal (shows “powershell” or “cmd” or “bash”)
- ✅ Git Bash (recommended if you installed Git for Windows)
- ✅ PowerShell (works fine too)
- ⚠️ Command Prompt (cmd) (works, but some commands look different)
- Mac/Linux users: The default terminal works perfectly
💡 Tip: Git Bash makes commands identical across all operating systems!
Option 2: Standalone PowerShell (Windows)
- Press Windows Key
- Type “PowerShell”
- Click “Windows PowerShell”
Option 3: Git Bash (Windows)
If you installed Git for Windows:
- Press Windows Key
- Type “Git Bash”
- Click “Git Bash”
This is recommended because all commands in this guide work exactly as written!
Option 4: Terminal App (Mac)
- Press Cmd + Space
- Type “Terminal”
- Press Enter
Option 5: Terminal App (Linux)
Usually Ctrl + Alt + T opens a terminal.
Available Lecture Tags
You can see all available lecture checkpoints here: https://github.com/L3GJ0N/road-profile-viewer/tags
Lecture tags are named: lecture-01, lecture-02, lecture-03, etc.
Step-by-Step Instructions
Step 0: Find Your Parent Folder
If you already have a road-profile-viewer folder:
Open your terminal and navigate INTO your existing road-profile-viewer folder first:
cd path/to/your/road-profile-viewer
💡 Not sure where it is? Open your road-profile-viewer folder in File Explorer (Windows) or Finder (Mac), then:
-
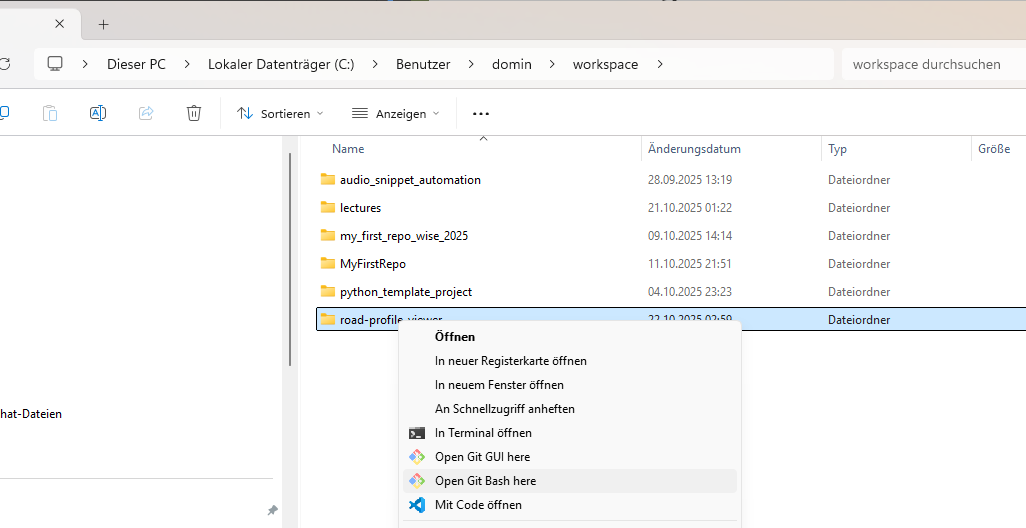
Windows: Right-click inside the folder, select “Open Git Bash here” or “Open in Terminal”
-
Mac: Right-click the folder, hold Option, select “Copy as Pathname”, then in terminal type
cdand paste
Now run this command to see your current location:
pwd
This shows you the full path to your repository. For example: C:\Users\YourName\projects\road-profile-viewer
The parent folder is everything BEFORE \road-profile-viewer. In this example, it’s C:\Users\YourName\projects.
If you DON’T have a road-profile-viewer folder yet:
You can clone it anywhere! Recommended locations:
- Windows:
C:\Users\YourName\workspaceorC:\Users\YourName\projects - Mac/Linux:
~/workspaceor~/projects
Just navigate to that folder in your terminal:
cd C:\Users\YourName\workspace
or
cd ~/workspace
Don’t have a workspace folder yet? Create it first:
mkdir C:\Users\YourName\workspace
cd C:\Users\YourName\workspace
or on Mac/Linux:
mkdir ~/workspace
cd ~/workspace
Step 1: Backup Your Old Repository (Optional)
⚠️ Only do this step if you already have a road-profile-viewer folder!
If you want to keep your old work, rename the folder:
On Windows (PowerShell or Command Prompt):
move road-profile-viewer road-profile-viewer-old
On Mac/Linux:
mv road-profile-viewer road-profile-viewer-old
Or simply delete it if you don’t need it:
On Windows:
rmdir /s road-profile-viewer
On Mac/Linux:
rm -rf road-profile-viewer
Step 2: Navigate to the Parent Folder
Now go UP one level to the parent folder (where the road-profile-viewer folder lives, or where you want to create it):
cd ..
Verify you’re in the right place:
pwd
You should see the parent folder path (WITHOUT road-profile-viewer at the end).
Step 3: Clone from the Lecture Tag
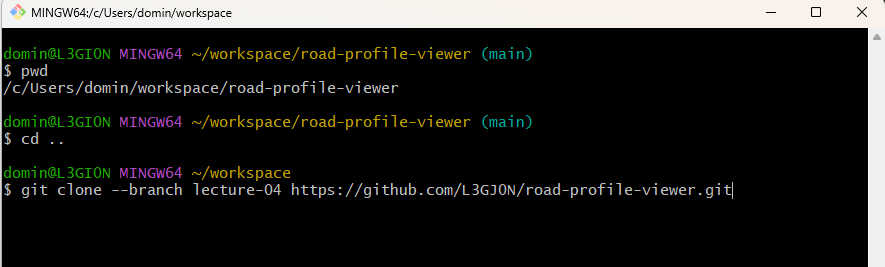
Now clone the repository from a specific lecture tag. Replace XX with the lecture number you want to start from (e.g., lecture-04):
git clone --branch lecture-XX https://github.com/L3GJ0N/road-profile-viewer.git
cd road-profile-viewer
Example: To start from lecture 4:
git clone --branch lecture-04 https://github.com/L3GJ0N/road-profile-viewer.git
cd road-profile-viewer
Visual example of these commands in Git Bash:
What this does:
- Downloads the code from lecture 4 into a new
road-profile-viewerfolder - Changes your current directory into that folder
- You’re now inside the fresh repository
Step 4: Change the Remote to YOUR Repository
Replace [YOUR-GITHUB-USERNAME] with your actual GitHub username:
git remote set-url origin https://github.com/[YOUR-GITHUB-USERNAME]/road-profile-viewer.git
Example: If your username is student123:
git remote set-url origin https://github.com/student123/road-profile-viewer.git
Step 5: Verify the Remote is Correct
Run this command to check:
git remote -v
You should see YOUR username in both lines, like:
origin  https://github.com/[YOUR-GITHUB-USERNAME]/road-profile-viewer.git (fetch)
origin  https://github.com/[YOUR-GITHUB-USERNAME]/road-profile-viewer.git (push)
Step 6: Push to YOUR Repository
git push --force origin main
If this asks for authentication, use your GitHub username and password (or personal access token).
Step 7: Verify Your App is Running
Now that you have clean code, test that the application works:
cd src/road_profile_viewer
uv run main.py
If the app runs without errors, you’re all set!
Done! 🎉
You’re now caught up to the lecture checkpoint and can continue from there!
Your repository now has:
- ✅ All the correct code from that lecture
- ✅ The full commit history showing how the code evolved
- ✅ A clean starting point to continue learning
Common Issues
“fatal: Remote branch lecture-XX not found”
The lecture tag doesn’t exist yet. Check the available tags at: https://github.com/L3GJ0N/road-profile-viewer/tags
“Permission denied” or “Authentication failed” during push
You need to authenticate with GitHub:
- Make sure you’re using your correct GitHub username
- You may need to use a Personal Access Token instead of your password
- See: https://docs.github.com/en/authentication/keeping-your-account-and-data-secure/creating-a-personal-access-token
“Repository not found” when setting remote
Double-check that:
- You spelled your GitHub username correctly
- Your repository exists on GitHub
- The repository is named exactly
road-profile-viewer